Monthly Archives: July 2025

From Simulator to Reality: Transitioning to Real FPV Flights

Introduction
You’ve clocked hours in the simulator, mastered throttle control, and flown through digital gates like a pro. But flying in the real world brings new challenges — wind, battery limits, crashes, and pressure.

This guide helps you transition safely and confidently from FPV simulator to real-world flying, with practical tips, gear setup advice, and a progressive training plan.


1. Sim Success ≠ Real World Ready

In the sim, you can hit reset. In real life, one crash could mean hours of repair. Here’s what changes:

  • Weight & inertia feel different

  • Environmental awareness becomes critical

  • Hardware limitations (latency, battery, range) affect timing

  • Fear of crashing can disrupt your confidence

But don’t worry — if you trained right, you’re already ahead.


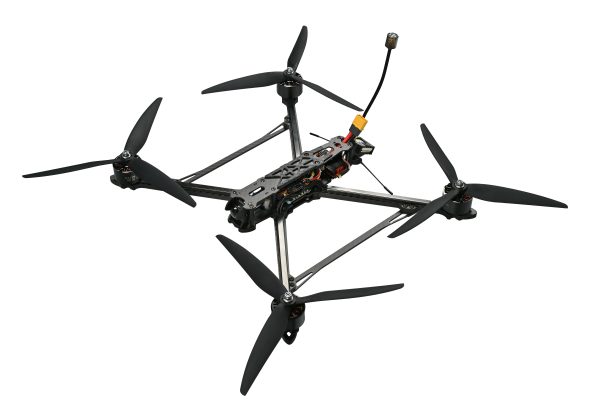
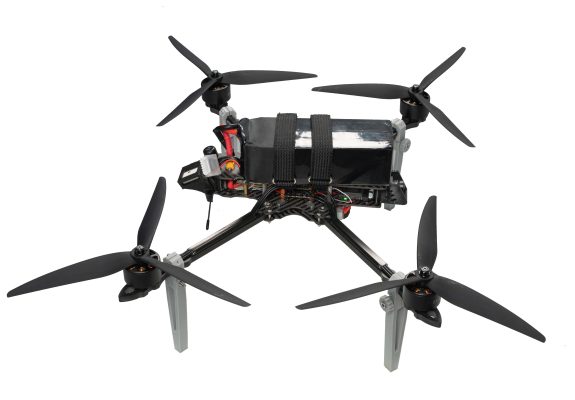
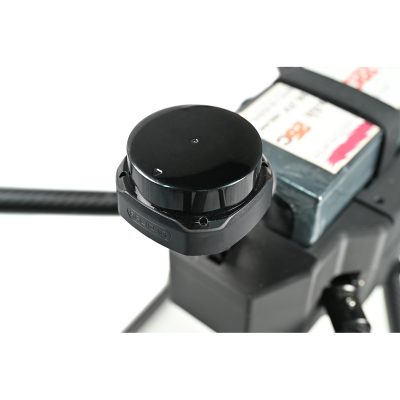
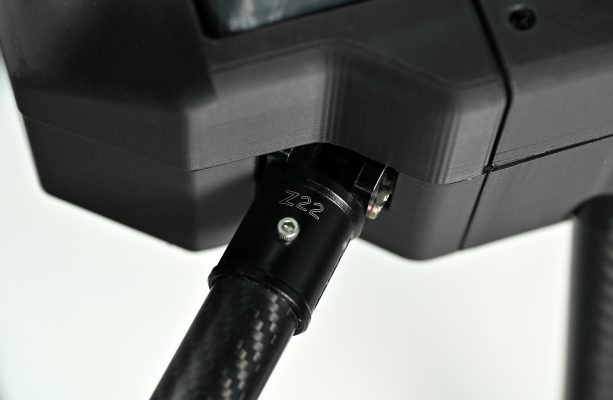
2. Pre-Flight: Setup & Checklist

Before your first outdoor session, ensure:

Receiver bound, motors tested (without props first)
Failsafe configured (cut throttle when signal lost)
✅ OSD shows voltage, RSSI, timer, and horizon
✅ Battery secured, screws tightened
✅ First few packs: use cheap props, fly in open space

Always carry spares: props, tools, batteries, zip ties.


3. Start in Angle Mode, Then Acro

Even if you’ve trained in Acro on the sim, try this:

  • Pack 1–2: Angle mode to regain physical space awareness

  • Pack 3–5: Switch to Acro, but keep it slow

  • Focus on straight lines, level turns, and throttle management

Tip: Use low camera tilt (10–15°) for better visibility and control early on.


4. Practice Patterns You Know from the Sim

Recreate what you flew in the simulator:

  • Figure 8s

  • S-turns

  • Loops around cones or trees

  • Hover box (practice altitude lock within 1m)

Familiar moves build confidence quickly — your muscle memory works best when the routine matches.


5. Film Your Flights & Debrief

Use a DVR or GoPro to review:

  • How smooth are your stick inputs?

  • Are you over-correcting or drifting?

  • Was throttle too high or too low?

  • Did you stay on the line?

Debrief after each flight. Improve one small thing per battery pack.


Conclusion
Going from sim to real FPV flying is a huge step — but with the right habits, it’s also the most rewarding. Take it slow, respect your gear, and enjoy the freedom of true FPV flight. You’re not a beginner anymore — you’re a real pilot now.

How to Design the Perfect FPV Practice Track for Skill Progression

Introduction
Progress in FPV flying doesn’t come from random flips — it comes from structured repetition. Whether you’re a beginner learning throttle control or an intermediate pilot refining flow, a custom practice track is your best tool for steady improvement.

This article walks you through how to design your own FPV practice course, including layout tips, key obstacles, and progression strategies.


1. Choose the Right Location

Before placing cones or flags, pick a safe and repeatable environment:

✅ Open field, backyard, parking lot, or abandoned warehouse
✅ No overhead wires or busy roads
✅ Wind-protected if possible
✅ Flat surface for easy walking and recovery

Use tools like Google Maps + on-site photos to pre-plan your layout.


2. Set a Purpose for the Track

Your route should match your current training goal. Example focuses:

  • 🎯 Throttle & elevation control → simple up-down gates or climbing arcs

  • 🔁 Turning flow practice → S-curves, figure 8s

  • 🚀 Speed control → long straight sections into tight corners

  • 🧠 Line memorization → full loops with landmarks

Design small at first, then expand complexity as you improve.


3. Build with What You Have

You don’t need fancy gates. Try:

  • Plastic cones, PVC pipes, pool noodles

  • Cardboard boxes, garden stakes, hula hoops

  • Trees, benches, or fences as natural markers

  • Chalk or colored tape for route indicators

Make the track visible in FPV camera view — high contrast colors help.


4. Layout Tips for Smooth Flow

  • Start with takeoff pad + wide turn → into a gate

  • Add 1–2 obstacles per lap: dive gate, slalom, orbit pole

  • Include open sections for freestyle movement

  • Leave space between objects: 3–5 meters minimum

  • Use loops, zigzags, and fake-outs to create rhythm

Bonus: film your flights and draw the track digitally for review.


5. Progressive Difficulty Plan

Design your track for daily repetition and slow difficulty increase:

Week 1: Wide gaps + basic loops
Week 2: Add tighter S-curves
Week 3: Include elevation shifts or tree gaps
Week 4: Fly full lap at consistent speed

Keep a journal or logbook to track crash spots, success rates, and new PBs (personal bests).


Conclusion
FPV isn’t about flying everywhere — it’s about flying better. By building your own training course, you’ll create muscle memory, improve flow, and fly with more confidence. Make it fun, measurable, and personal — and progress will come naturally.

Crash Happens: 5 Practical FPV Repair & Troubleshooting Tips

Introduction
If you fly FPV, you crash. It’s part of the learning curve — and it’s how we improve. But what matters most isn’t avoiding crashes, it’s how fast you can recover and get back in the air.

In this article, we’ll walk you through 5 essential FPV repair and troubleshooting tips every pilot should know, especially after a hard landing or crash. Don’t panic — fix, learn, fly again.


1. Visual Inspection First

After a crash, don’t immediately plug in the battery. Do a thorough check:

  • Are any arms, mounts, or propellers broken?

  • Are motors spinning freely (no grass or sand inside)?

  • Are any wires disconnected or bent pins visible?

  • Is the camera or VTX loose?

Take photos if needed — it helps with identifying bent or missing parts.


2. Replace Props, Always

Even if a propeller looks fine, replace it after a crash. Cracks or slight warping can cause:

  • Vibration

  • Oscillation

  • Motor overheat

  • Unpredictable flying

Props are cheap — never trust a crashed one.


3. Motor & ESC Testing

If a motor makes grinding noises, remove the prop and spin it by hand.

  • If rough: bearing may be damaged

  • If wobbly: bell might be bent

  • If no spin at all: test ESC connection or replace motor

Use Betaflight motors tab to test individually — but only with props off.


4. Check for Hidden Shorts or Smoke

Before powering back up:

  • Smell for burnt components

  • Look for black marks or melted solder

  • Use a smoke stopper when plugging in again

  • Use multimeter to check for shorts between power pads

One mistake can fry your stack — safety first.


5. Frame Alignment & Vibration Control

After impact, your frame may have shifted. Check for:

  • Bent arms or twisted top plate

  • Loose screws or standoffs

  • Damaged TPU mounts for camera or antenna

  • Any jello in footage — may be from bent motors or frame imbalance

Tighten all bolts, re-level the stack, and balance your new props.


Conclusion
Crashing is just part of FPV life. With the right repair mindset and a few essential tools, you’ll save both money and frustration. Each repair is a lesson — and every rebuilt quad flies better.

Indoor FPV Cinematics: Flying Tips, Lighting Setup & Path Design

Introduction
Indoor FPV flying is one of the most exciting and challenging styles of drone filming. From cafés and galleries to warehouses and live events, FPV drones offer a unique way to capture immersive, flowing shots in tight spaces.

This guide introduces the basics of indoor FPV flying, including gear setup, flight techniques, lighting tips, and how to plan your flight paths to shoot stunning indoor sequences.


1. Why Indoor FPV?

  • Creates immersive, first-person camera angles

  • Showcases architecture, interior design, and brand experiences

  • Ideal for one-take walkthrough videos, venue promos, or product storytelling

Popular examples: real estate tours, restaurants, hotels, exhibitions, factory floor showcases.


2. Drone Setup for Indoor Flights

✅ Use small cinewhoop (e.g., 2.5–3.5 inch ducted drones)
Ducted propellers are a must — they protect people and walls
✅ Choose low throttle, smooth motor response
✅ Add a GoPro or naked camera for HD footage
✅ Fly with low rates + high expo for smoother control

Bonus: use props-in camera angles for a more immersive feel.


3. Flight Technique Essentials

  • Practice in simulators before flying in tight real spaces

  • Keep slow and stable altitude, avoid aggressive moves

  • Use pre-arm angle mode or stabilization for small rooms

  • Stay within line of sight, even if flying with goggles

  • Be ready to disarm immediately in case of sudden obstacle or tight gap

Tip: Walk your route first, then fly it. Muscle memory helps with precision.


4. Lighting & Exposure Considerations

  • Indoor spaces may have uneven or dim lighting

  • Add extra LED lights, soft boxes, or practical lighting to fill shadows

  • Use manual exposure settings to avoid flickering

  • Set GoPro to flat color profile + ISO 100–400 for clean footage

  • Check white balance (avoid auto mode)

Remember: lighting is 50% of the shot. No good light = no cinematic results.


5. Path Planning & Shot Design

Great indoor FPV comes from planning, not improvisation. Plan your shots:

  • 🧭 Walkthrough route: entrances → narrow hallways → open reveals

  • 🎯 Point of interest fly-bys: close-up on décor, products, faces

  • 🔁 Loop patterns: fly back to the start to create transitions

  • 🔄 Use dynamic moves: orbit objects, tilt through shelves, peek through frames

Pro Tip: Keep your flight time short (1–2 min per take) to avoid battery sag and overheating indoors.


Conclusion
Indoor FPV combines creativity, precision, and planning. With the right drone, smooth technique, and thoughtful lighting, you can transform simple interiors into stunning visual journeys. Every take is a chance to tell a story — and your drone is the camera.

FPV Cinematic Moves: 5 Must-Know Shot Techniques for Stunning Aerial Footage

Introduction
Flying an FPV drone is fun — but filming cinematic footage with purpose and style? That’s a whole different level. Whether you’re creating travel videos, action sequences, or urban fly-throughs, cinematic FPV shots can bring your storytelling to life.

This guide introduces five essential FPV shooting techniques to help you design stunning, smooth, and powerful aerial moves.


1. The Power Dive

Description: A steep vertical descent from a tall object (tower, cliff, skyscraper).
Use: Adds energy, scale, and vertical dynamics to a scene.
Tip: Keep the building centered while descending. Use slight roll/yaw for cinematic motion.

✅ Best for: Cityscapes, industrial areas, mountain edges.


2. The Orbit (Cinematic Circle)

Description: Circling around a subject while keeping it centered in the frame.
Use: Highlights the subject, creates depth and parallax movement.
Tip: Adjust throttle and yaw smoothly; maintain consistent radius and altitude.

✅ Best for: Statues, cars, people, architectural landmarks.


3. The Push-In Shot

Description: Flying straight toward the subject at medium or low altitude.
Use: Builds tension and draws viewer attention toward the subject.
Tip: Keep it slow and steady, avoid abrupt stick movements.

✅ Best for: Reveals, entrances, or dramatic location intros.


4. The Pull-Out Reveal

Description: Fly backward while revealing a larger scene behind.
Use: Great for transitions, reveals of landscapes or crowds.
Tip: Start close to the subject and smoothly gain height while pulling back.

✅ Best for: Mountains, event areas, wide nature views.


5. The Tree Gap Fly-Through (Pro move)

Description: Precision flying through narrow gaps or under branches.
Use: Adds thrill and immersion, often used in action or chase scenes.
Tip: Use low rates and expo. Pre-plan your line. Fly slow at first.

✅ Best for: Forests, ruins, abandoned structures.


Bonus Tip: Combine 2–3 of these moves in a single take for dynamic edits. E.g., orbit → pull-out → dive.


Conclusion
Cinematic FPV flying isn’t just about technical skills — it’s about intentional camera movement. When you fly with a vision, each shot becomes part of a story. Start with these 5 moves, master your timing and flow, and your footage will go from “cool” to unforgettable.

PV Night Flying Guide: Safety Settings & Cinematic Tips

Introduction
Night flying with FPV drones opens up a world of unique visuals and thrilling experiences. From glowing cityscapes to light trails in the sky, flying at night can be both rewarding and risky. Whether you’re looking to film cinematic night scenes or just enjoy some quiet night-time freestyle, preparation is everything.

In this guide, we’ll cover essential safety checks, gear setup, lighting options, and flying tips to help you fly confidently in the dark.


1. Why Fly at Night?

  • Less wind, fewer people, and quieter skies

  • Stunning visual effects: light trails, neon reflections, long exposures

  • Ideal for cinematic filming, light-painting shots, or exploring lit-up buildings

But night flying also means: limited visibility, orientation difficulty, and increased risk. That’s why smart planning is critical.


2. Pre-Flight Safety Checks

Before flying at night, always confirm:

✅ Battery is fully charged and high-quality
✅ GPS (if equipped) locks before dark takeoff
✅ All antennas, VTX, and camera cables are secure
✅ Failsafe is properly set (return to home or disarm)
✅ Local airspace allows night flying (check legal regulations)

Also bring a flashlight or headlamp, and fly with a spotter if possible.


3. Drone Setup for Night Flying

🛠 Recommended hardware:

  • Low-light FPV camera (e.g., Foxeer Cat, RunCam Night Eagle)

  • Strong VTX (800mW+) for clean signal in dark areas

  • LED strips or navigation lights on arms or frame

  • ND filter OFF – you need all the light you can get

  • Wide dynamic range settings in camera or Betaflight OSD

Optional: Add beeper or buzzer in case of crash recovery in dark terrain.


4. Flying Techniques at Night

  • Fly slow and controlled – less visibility means tighter reaction time

  • Stay within line of sight and visual range of LED lights

  • Don’t fly behind hills, trees, or tall buildings — easy to lose signal

  • Practice smooth turns and orbit shots for cinematic effect

  • Record in 4K 30fps + high ISO and use post-processing to clean up noise

Bonus tip: Practice your flight route in daylight first, then repeat at night.


5. Editing & Lighting Effects

Night footage needs editing love. Use:

  • DaVinci Resolve / Premiere Pro: Reduce noise, increase contrast

  • Add LUTs for color grading

  • Use long exposure effects to highlight motion trails

  • Combine FPV clips with ground shots for storytelling


Conclusion
Flying FPV at night is a next-level experience — beautiful, risky, and rewarding. With the right setup and mindset, you can capture breathtaking footage while keeping safety your top priority. Respect the rules, light up your quad, and let the night sky be your playground.

From Simulator to Real Flight: FPV Beginner’s Transition Guide

Introduction
You’ve mastered flying in the simulator. You can hover, dive, orbit, and recover from spins. But now comes the big question: Are you ready to fly your FPV drone in real life?

Transitioning from simulator to real flight is a huge step, both technically and mentally. In this guide, we’ll walk you through everything a new pilot needs to know before lifting off — for real.


1. Simulator Is Not Reality – But It’s Close

Simulators like Liftoff, Velocidrone, and DRL are excellent for building muscle memory, reflexes, and orientation. However:

  • In the sim: Crashes are free, resets are instant.

  • In real life: Crashes mean repairs, cost, and possible fear.

Don’t expect perfect translation — but if you can fly acro mode confidently in sim, you’re ready for the next step.


2. Checklist Before First Real Flight

Test your transmitter – Ensure correct model setup, throttle calibration, and arming settings.
Set up angle mode for first flights, even if you trained in acro.
Prop direction double check – Most crashes happen due to incorrect props.
Throttle scale limit (optional) – Reduce max throttle in Betaflight to 80% for smoother control.
Failsafe settings – Always configure a GPS failsafe or drop-to-disarm mode.


3. Choose the Right Environment

Your first flight should be in:

  • Wide, grassy field – No trees, no people, soft landings

  • Low wind condition (under 5m/s)

  • Daylight hours with good visibility

Avoid concrete, buildings, or busy parks. Bring a friend or spotter if possible.


4. Flight Technique Tips for First Real Flights

  • Arm with the drone facing away from you

  • Throttle up slowly, don’t “pop” into the air

  • Practice hovering 1–2 meters high, get used to stick response

  • Land before the battery hits 14.0V (on 4S)

  • Keep flights short (1–2 mins) for early confidence

Always fly line of sight (LOS) at first — save the FPV goggles for flight #3 or #4.


5. Common Mistakes to Avoid

  • Flying in acro mode too early

  • Overconfidence from sim training

  • Ignoring pre-flight checks (props, battery, signal)

  • Flying too far on first flights — stay close

  • Getting flustered after minor crashes

Remember: Your first flights are about control, not tricks.


Conclusion
Going from simulator to real FPV flight is an unforgettable experience — exhilarating, terrifying, and addictive. With preparation, patience, and humility, you’ll make the leap smoothly. And once you’re in the air? There’s no going back. Welcome to the skies.

Don’t Panic! FPV Crash Repair & Troubleshooting Guide for Beginners

Introduction
Crashing — or as we say in FPV, “crashing gloriously” — is part of the learning process. Whether it’s your first flight or your hundredth, FPV drones are built to crash, repair, and fly again. But how you respond to a crash can make the difference between a quick fix and a long downtime.

In this guide, we’ll walk you through the step-by-step post-crash checklist, common issues and how to fix them, basic tools you should always have, and when it’s okay to fly again.


1. Stay Calm and Check the Area

  • First, retrieve your drone safely — watch out for water, traffic, or people.

  • Remove the battery immediately to prevent fire risk.

  • Check for any damage to people, property, or surroundings.

  • If using a GPS drone, record the GPS log or playback to review the crash.


2. Basic Post-Crash Checklist

Start with a visual inspection, then go deeper if needed:

  • Props: Cracked or bent? Replace immediately.

  • Arms/Frame: Check for cracks, delamination, or loose screws.

  • Motors: Spin each motor by hand. Any resistance = replace or open for cleaning.

  • Wires: Look for disconnected or pinched wires.

  • Camera & VTX: Check for loose connectors or signal loss.

  • Flight Controller: Are the LEDs still lighting up as normal?

If all checks pass, you can test-power the drone without props on the bench.


3. Common Issues & Quick Fixes

Problem Cause Solution
One motor not spinning ESC or motor damage Test with motor tester or swap ESC
Video feed lost VTX loose, antenna snapped Check solder joints, replace antenna
No power on plug-in Broken XT60, blown capacitor Replace connector, check continuity
Drone flips on takeoff Wrong motor direction or prop order Check Betaflight motor tab
Beeping nonstop FC can’t detect receiver Rebind or check UART settings

4. Tools Every FPV Pilot Should Carry

  • 🔧 1.5mm/2mm/2.5mm hex drivers

  • 🔌 Spare props and prop wrench

  • 🔎 Magnifying glass or loupe

  • 🔋 Multimeter (for voltage checks)

  • 🔩 Soldering iron + flux + wire

  • 🔧 Zip ties, electrical tape, M3 screws

  • 💻 USB cable + Betaflight configurator

Optional: Motor bell puller, hot glue, spare ESC/FC stack for quick swap.


5. When Is It Safe to Fly Again?

✅ All systems tested ✅ No abnormal heat ✅ Props balanced ✅ Motors spin free ✅ Radio link stable ✅ Video feed working
Only then — test hover slowly in a safe area, preferably over grass. If anything feels odd, land and recheck immediately.


Conclusion
Crashing is normal, but learning to repair is what builds real skill. With a basic checklist, a few tools, and some patience, even beginners can keep their drones in the air and out of the repair bin. Remember: every crash is a lesson — and every repair makes you a better pilot.

FPV Daily Flying: 5 Best Places to Train and Shoot Cinematic Footage

Introduction
Choosing the right environment can greatly improve your FPV flying experience. Whether you’re just learning to hover or filming smooth cinematic shots, the location you fly in determines how fast you progress — and how good your footage looks.

In this article, we explore five ideal places to practice FPV flying and capture amazing visuals. These spots are popular among both beginners and experienced pilots, and each offers its own benefits and challenges.


1. Open Grass Fields

Best for: Beginners & Acro training
Why it’s great:

  • Wide, obstacle-free space for error

  • Soft landings reduce crash damage

  • Ideal for tuning, hovering, throttle control
    Tips: Avoid windy days. Early mornings usually have calm wind and fewer people.


2. Empty Parking Lots or Rooftops

Best for: Freestyle training & flow practice
Why it’s great:

  • Plenty of structures to orbit or dive

  • Good for practicing yaw turns and gap shots

  • Usually quiet on weekends or evenings
    Tips: Choose private lots with permission to avoid conflict. Use prop guards if flying close to surfaces.


3. Forests and Tree Gaps

Best for: Precision flying & skill growth
Why it’s great:

  • Perfect for gap shooting and obstacle runs

  • Teaches throttle modulation and spatial awareness

  • Natural light creates cinematic footage
    Tips: Fly slow. Use GPS apps to check for nature preserve restrictions.


4. Abandoned Buildings or Industrial Zones

Best for: Cinematic filming & FPV tours
Why it’s great:

  • Unique textures, light patterns, and indoor spaces

  • Adds storytelling to your video

  • Great locations for long-range or slow reveals
    Tips: Ensure legal access. Fly with a spotter. Watch out for metal interference indoors.


5. Mountains, Hills, and Coastal Cliffs

Best for: Long-range cruising & epic landscapes
Why it’s great:

  • Breathtaking backgrounds for cinematic videos

  • Clean airspace and open sightlines

  • Minimal signal interference
    Tips: Use GPS failsafe, strong VTX, and check local airspace laws. Bring extra batteries — you’ll want to fly more.


Conclusion
Great FPV flying isn’t just about skills — it’s also about where you fly. Practicing in diverse environments builds confidence, sharpens control, and inspires creative shots. Just remember: fly legally, fly safely, and respect your surroundings. The world is your playground — go fly it.

FPV Drone Cinematic Shooting Guide: Settings, Tips & Techniques

Introduction
Cinematic FPV footage is one of the most visually stunning forms of drone videography. It offers unmatched immersion, dynamic motion, and creative storytelling — all from a first-person view. But capturing high-quality video with FPV drones requires more than just flying skill.

In this guide, we’ll break down the essential camera settings, flying techniques, and gear tips to help you start shooting smooth, cinematic FPV videos — even if you’re a beginner.


1. Best FPV Drone Types for Cinematic Video

While racing drones prioritize speed and agility, cinematic FPV drones focus on stability and smooth control.

Recommended types:

  • Cinewhoops (2–3 inch props): Indoor use, slow and controlled

  • 5-inch freestyle drones: Most common for dynamic shots

  • Long-range cruisers: Stable and GPS-assisted for scenic landscapes

If you’re just starting out, a Cinewhoop like the GEPRC Naked Hero build or BetaFPV Pavo30 is a great choice.


2. Camera Settings for Smooth FPV Video

Whether you’re using a GoPro, DJI Action, or Insta360, proper camera settings are key.

Recommended settings:

  • Resolution: 2.7K or 4K

  • Frame Rate: 30fps (for cinematic) or 60fps (for slow motion flexibility)

  • Shutter Speed: Double your frame rate (e.g., 1/60 for 30fps)

  • ISO: Keep it low (100–400) to reduce noise

  • Color Profile: Flat or Log for better post-editing

  • Stabilization: Use Gyroflow or in-camera Horizon Lock

Use an ND filter to maintain proper motion blur during daylight.


3. Flight Tips for Cinematic Shots

Great footage comes from smooth piloting, not aggressive flips. Practice these:

  • Smooth stick input: No jerky throttle or yaw

  • Pre-plan your line: Know your route before takeoff

  • Keep altitude steady: Avoid sharp vertical changes

  • Use slow turns and reveals: Build suspense and flow

  • Orbit shots: Circle around your subject slowly

Bonus: Fly in manual (Acro) mode for complete movement control.


4. Editing & Stabilization Tools

Post-production is a huge part of cinematic FPV.

Suggested tools:

  • Gyroflow: Stabilizes footage using gyro data

  • DaVinci Resolve / Premiere Pro: Video editing and color grading

  • LUTs (Look-Up Tables): Use cinematic LUTs to color your flat footage

Don’t skip editing — it’s where raw FPV clips become true cinematic magic.


5. Common Mistakes to Avoid

  • Flying too fast for cinematic shots

  • Using auto settings on the camera (results in exposure flicker)

  • Ignoring ND filters on sunny days

  • Flying in overly windy conditions

  • No subject or composition — cinematic = storytelling!


Conclusion
Cinematic FPV isn’t just about flying — it’s about creating a visual experience. With the right drone, camera settings, and flying discipline, even beginners can shoot professional-quality videos. Practice your lines, fine-tune your settings, and most importantly — enjoy the flight.